Tuesday 30 June 2015

Nautical Nicknacks

Hello my friends,
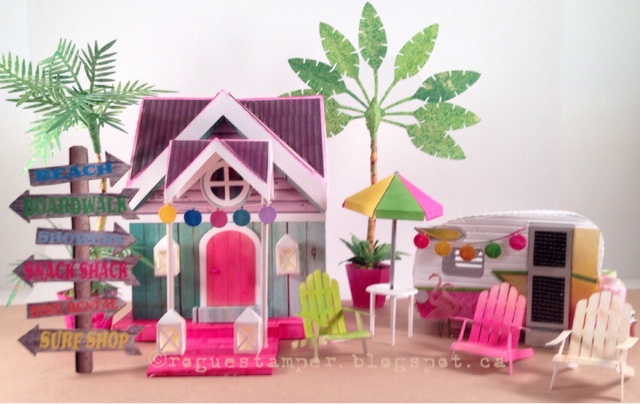
I have had this one in my drafts for a while, I pinned some great 3D boat projects on my Pinterest board and I have wanted to make my own version. 
Of course, once again, my go to was an SVGCuts file. I cut the rowboat at 200%. That gave me plenty of room to add lots of paper cut outs and shells.

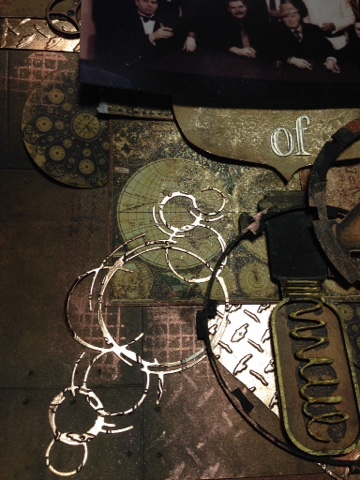
I used the Tim Holtz die in the very back. I LOVE that globe die, it's so detailed. The "netting" is a Memory Box die. It's not really a fishing net, but I think it looks like one.
I added some seagulls and shells and a message in a bottle.
The anchor stamp is an acquisition from Michael's Craft store.

I am entering my Nautical Nicknacks into the following challenges:
City Crafter Challenge Blog Let's Go Nautical
Simon Says Stamp Mnday Challenge - Summer

Wednesday 17 June 2015

Fab 50's

Here's a fun card I made the other day. A beautiful friend of mine is turning 50 this month, so I made a vintage 50's card for her (even though we didn't grow up in that era)

It began with a great piece of 12x12 paper from "Fab Scraps". I cut the lower right corner down to 5x7 to keep the image whole. Next I dug out an OLD wood stamp I had. Do you remember the stamp company "Mostly Animals"? If you do, you're an old stamper like me.

I coloured it to match the background paper. Then made my own "records" with 2 different sized circle dies. I tinted some resin roses, added a dyed crochet circle and a bow for the top. The last thing to go on,was the number 50.  

Tuesday 16 June 2015

A Happy Accident

I screwed up. I screwed up, but I made it work. Mainly because I am cheap and I didn't want to waste the clear transparency sheet that didn't cut all the way through on my Silhouette Machine. When life gives you lemons and all that...carry on creating.
I began by cursing at the Silhouette Machine. Then I cut the acetate down into card sized squares. I had wanted them to be stencils, but that didn't work out. So I pulled out my alcohol inks and started blending colours on the back side.
I rubbed potting soil archival ink over the cut lines and wiped off the excess then added gold and silver inks to the front edges to mimic mercury glass.
The "frame" is just woodgrain paper cut and mitred to hide the edges and the foam tape.
I cut the same designs with paper, tinted them a bit and mounted them on the acetate. A little bling and a simple sentiment completed the card.
So, you see, it was a happy accident after all. I am quite happy with the outcome. See you next time...

Sunday 7 June 2015

Monochromatic Rose

Hi everyone,
Here's another quick card. using the Colorways Noir Collection from Paper House.
I cut the 12x12 sheet in half, scored and folded at the 6" mark and added some roses made from Tim Holtz' Tattered Pinecone die. Looking at the picture, it looks like I used a Spellbinders rose on the top one.
Add some bling and a sentiment and you're good to go...
thanks for looking, see you next time...

Saturday 6 June 2015

Cheers to Retirement

Here's a quick and easy card thanks to the Silhouette file
Cut the "retirement" file on your Silhouette and add a little distress ink for an ombre look.
I backed the card with some green paper stamped with tropical leaves (Kaisercraft)
Add some embellishments on top. In this case, I cut "Happy" and a tropical drink from my library.
Distress colors used:
Twisted Citron, Mowed Lawn, Abandoned Coral, Raspberry, Spun Sugar

Friday 5 June 2015

Beach House Dreams

I couldn't go too long without making a 3D project Hahaha. I had a beach house in mind for a while and I finally found the right paper to make it.
I used the Lighthouse Keepers house from my SVGCuts.com kit Seaside
I wanted a front porch on the house, so I cut the roof and panels at 50% scale on my Silhouette.
I made a sign for my beach house too. The file can be found here. It's from Megan Hardy Designs.  I turned it into a print and cut instead of a paper piecing.
The lanterns are from another SVGCuts kit Enchanted Autumn and the Shasta Trailer was in my stash from a previous post I did last summer here

I made the palm trees with some diecut leaves and some wire to made it sturdy
The little Adirondack chairs are yet another 3D file from the Silhouette store. I would love to have a real beach house like this lazing away the summer days by the ocean.
Thanks for checking it out, see you next time

Monday 1 June 2015

Urban Scrapbook's June Chalłenge kit

Greeting everyone,
I am particularly proud of this month's layout for the Urban Scrapbook's design team challenge. 
It all starts with a great photo for me. I knew that I wanted to do something special with this picture.

A bunch of us got together a couple of months ago so the guys could enjoy some premium Scotch. It was a formal night and while the ladies drank lots of wine upstairs, the men enjoyed a presentation and tasting of some very expensive Scotch (insert a shudder and horrible after taste look on my face here) downstairs. I think I will stick with wine hahaha...

This month's kit is perfect for a masculine/steampunk layout. The paper line is Marion Smith Designs and the kit also includes chipboard shapes from Blue Fern Studios and Tim Holtz' metallic paper and letter stickers.
I added some gold liquid pearl paint to the light bulb
I made this picture a little darker, so you can see the shine of the Perfect Pearl powder in the background.
I can't wait to see the other pages everyone came up with.  They are on display this month at Urban Scrapbook and you can always check out the blog here, and don't forget, we have Pinterest boards too! Come follow us.  see you next time